If you’re planning to buy a pellet stove or already have one, you know that the installation part isn’t the easiest one.
Installation costs are usually more than $2,000, so if you’re handy and experienced – you should do it yourself.
But… If after reading our installation guide you’ll decide that you want to get a professional to do it, just click this link and fill out the form to get offers from your local contractors.
Without further ado, let’s hop on the exact steps you should follow to install it properly.
How To Install A Pellet Stove
Step 1: Install a hearth pad
Before even figuring out the installation process, you need to install a fireproof hearth pad on the floor where you will place your pellet stove.
The reason why we need the hearth pad is to prevent any chance of fire damage as there will be sparks and high heat coming out of the stove.
Step 2: Place the pellet stove properly
Now, place your pellet stove on the heart pad you installed previously. Make sure that you can cut the hole in the wall for our next step.
Also, an electric outlet should be as close as possible – the same as with electric fireplaces.
Step 3: Cutting the hole
The size of the hole you will cut on the exterior wall of the home depends on the size of the piping. It’s usually less than 4 inches wide.
Remove the pipe from the stove when you traced the vent pipe outline onto the wall.
Don’t worry if the hole isn’t perfect from the beginning, be patient and you’ll cut the “matching” hole in no time.
Step 4: Insert the piping
Once you’ve made a perfect fit hole in the wall, you need to insert a vent thimble (the sleeve of the actual piping) and piping.
Just make sure to seal the vent thimble on both sides and to install a cap on the outside, so you can prevent rain from coming close to the ventilation system.
Step 5: Setting the insulation
It’s important to set the insulation around the exhaust pipe to protect the ventilation system even more from rain or other weather conditions.
This is the step that most people tend to skip as they’re lazy, but it’s one of the most important ones.
Step 6: Screw and glue outside
Make sure to screw everything outside around the exhaust pipe.
If you’re living in a windy area, it might mess up with your outside piping and you don’t want any extra costs.
I recommend even gluing after you’ve screwed to ensure even more safety.
Step 7: Connect the pellet stove
The last step is to plug in the pellet stove to the electrical outlet and fill the hopper with pellets to start the heating process.
If you’ve done everything correctly, the pellet stove should function properly now.
This is how these steps look in action:
Also, you can watch this pellet stove installation video if you have a different type of pellet stove.
If you decide that you want to get a professional to install yourpellet stove, just fill out the form below and you’ll get offers from your local contractors 👇
Or feel free to call this number if you prefer to chat over the phone 👉 (855) 659-3394
How To Install Pellet Stove Insert
If you have an insert, then your installation process will look a bit different.
Step 1: Prepare everything
Before starting, you should make sure your fireplace is fully cleaned so the pellet stove can fit perfectly.
Sometimes it happens that the pellet stove can’t fit from the first attempt, so you might need to remove the damper.
However, always check for the right dimensions when buying a pellet stove.
Step 2: Install the piping
The difference between installing the insert and the whole pellet stove is that you won’t need to drill anything.
Just use your already-installed chimney to move the heat away from your stove. So, position your chimney liner through your chimney.
It will be easier for you if you can set them up properly from the roof instead of starting from the ground.
Step 3: Connect liner adapter
Once you have everything set up, you need to make sure that the adapter will fit your stove’s exhaust port.
Before even placing the pellet stove in the fireplace, connect your stove to the electric outlet as it’s much easier to do it before than after placing the stove.
Step 4: Place the stove
Now, just place your pellet stove properly inside the fireplace.
As you’ve already connected everything, it’s much easier to connect the liner to the exhaust part.
Step 5: Install a liner cap
You need to cap the liner at the top of your chimney.
This is very important as the cap holds everything and prevents rain and other weather from getting into your stove and exhausting the system.
The process is similar to wood-burning fireplace inserts.
Step 6: Turn on the stove
If everything is done properly, your home should be warm right now. Make sure you’ve done all the steps correctly and that you’ve installed everything properly.
Go ahead and watch this video to see how it should be done properly.
If you decide that you want to get a professional to install your pellet stove, just fill out the form below and you’ll get offers from your local contractors 👇
Or feel free to call this number if you prefer to chat over the phone 👉 (855) 659-3394

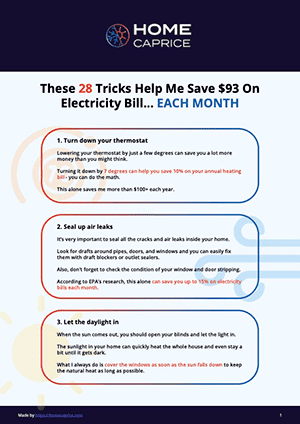
Download this FREE cheat sheet to find 28 tricks that can help you save on your electricity and heating bill each month.
Click here to get a FREE Cheat-SheetWhat You Should Be Aware Of
First things first, you have to check if pellet stoves are legally allowed in your area. There are some areas that have forbidden the use of pellet stoves.
There are some places like your bathroom where you should never install a pellet stove. It can cause fire and even insurance companies will deny you as you violated their policy.
Also, I wouldn’t install it in your bedroom as it can get noisy and it will definitely decrease your sleep quality.
If you think this article is helpful and useful, you should share it with your handy friends, so they can install it by themselves too.


Download this FREE cheat sheet to find 28 tricks that can help you save on your electricity and heating bill each month.
Click here to get a FREE Cheat-Sheet


