The time for replacing the thermostat has arrived, and you should know how to do it properly.
Unfortunately, there are a lot of guides with misleading information, and it can do more harm than good for you, so I’m glad you found this in-depth guide describing everything you need to know about thermostat wiring.
You must know how to replace the thermostat properly, so you’ll learn step-by-step how to install a new thermostat, no matter which type of thermostat you own.
Before jumping straight into that, take notes on the wiring color codes, as they’re essential in this process.
Thermostat Wiring Color Codes
When you first open the thermostat, you’ll have 16 sockets on its base marked with letters C, R, Y1, Y2, W1, W2, O/B, G, 2x RS, 2x ODT, AUX NO, AUX C, AUX NC, BK.
It all depends on your thermostat wires because 2-wire and 3-wire thermostats might not have all of these, but that’s not so important.
For each terminal, there’s a specific wire marked with a color.
The most important thing is to learn the wire colors and know what it does.
Black or Blue Wire (marked with “C”)
The C wire is connected directly to the transformer and is part of a 24V electric circuit.
In modern smart thermostats, the black or blue wire is usually connected to the C terminal.
If you have an older thermostat, you might not have the C wire because they work on-demand and not continuously.
Red Wire (marked with “R” or “RC”)
You can think of red wire as the power wire as they provide 24-hour volts to air conditioners.
No matter what model of thermostat you might have, all of them have a red wire.
White Wire (marked with “W1” or “W2”)
You can think about white wires as snow because they’re strictly for heating.
They can be found in gas thermostats, and you probably won’t find them in air conditioner thermostats.
It goes directly to the heating source or even heat pumps.
W2 is different from W1 because it’s made for 2-stage heating often found in heat pumps.
Orange & Blue Wire (marked with “O/B”)
The orange wire is for valve cooling and is often found in the outdoor unit of larger heat pumps.
On the other side, the blue wire is for reverse valve heating. As you can see, they are kind of similar, just meant for different occasions.
Green wire (marked with “G”)
This one is specific as it goes directly into the fan.
There isn’t anything spectacular about it, and they’re easy to remember.
Yellow wire (marked with “Y1” or “Y2”)
Y1 is for one-stage cooling found in basic air conditioners that most of us have at home. It’s yellow, and it’s easy to spot it from the beginning.
Y2 is for more advanced air conditioning systems that have 2 compressors or a two-stage compressor.
In most cases, you’ll have a Y1 in your thermostat.
Other wires
These terminals are rarely used, and they’re usually on the right side of the thermostat.
However, you must know that sometimes wire codes can have different colors than we mentioned here – it all depends on the technician who installed the thermostat.
Don’t worry, as in most cases, the wire codes have these colors we’ve just mentioned.
Take a look at smart air conditioners that have built-in thermostats.
Best Way To Remove The Old Thermostat
It’s easy for a technician to replace the old thermostat when they’ve met with color codes hundreds and thousands of times already.
But what should an average Joe do?
You’ll be surprised how simple it is – just take a picture.
If you unscrew the terminals and remove all the wires, you might forget how to connect each one properly, so take a picture of the old thermostat before moving further.
Now, a lot of people think that you can remove the thermostat right away, and you can easily rearrange wires. The problem is that wires can easily be lost in the wall, and you’ll have difficulty reaching them.
You probably want to avoid it, so just spread the wires and bend them outwards to prevent them from getting lost behind the wall.
By now, you should be able to remove the old thermostat, and now we come to the more interesting part…

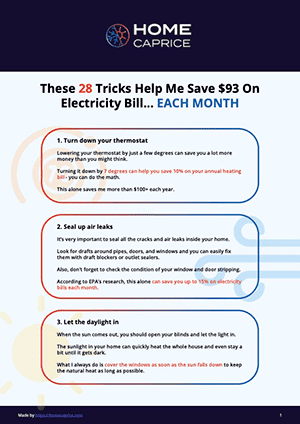
Download this FREE cheat sheet to find 28 tricks that can help you save on your electricity and heating bill each month.
Click here to get a FREE Cheat-SheetInstalling A New Thermostat
Now you have to put the new thermostat in the exact same position as the old thermostat.
Start reconnecting wire by wire like they’ve been connected to the old thermostat. Luckily, you have a picture on your phone now that helps you connect it properly.
Don’t worry if you didn’t take a picture; just scroll up, and you’ll see all the color codes you need.
Let’s summarize them again:
- Blue wire – for cooling
- White wire – for heating
- Rh – heating power
- Rc – cooling power
- Green wire – for fan
- Red wire – for power (24V)
When you’re reconnecting the wires, it’s very important that you tighten down the screw. Once you’ve checked it’s tightened enough, you can move to the new wire.
These were the basics of wiring a thermostat, now let’s talk about different types of thermostat wiring.
Even if your AC is broken or not functional, you can cool down your home without using AC.
Different Types Of Thermostat Wiring
2-Wire Thermostat Wiring
The 2-wire thermostat wiring is used for furnaces only, and it uses only two wires, as the name says.
It has only 2 wires:
- Red wire – power
- White Wire – heating
Wiring this type of thermostat is very easy, and you could even do it blindfolded – just kidding, don’t try it 😊
Let’s break everything step-by-step:
- Remove the thermostat
- Take a picture of the properly positioned wires
- Unscrew both wires from the terminal
- Put new 2 wires in the thermostat in the same path as they were in the old thermostat
- Put the control panel back once you’ve reconnected both wires
It’s as simple as that. If you’ve done everything properly, the new wires should control everything the same as the old thermostat.
3-Wire Thermostat Wiring
This type of thermostat wiring is used for boilers and heaters, so usually in the winter.
The three wires have the following codes: R, W, and G.
- R = Red wire for power
- W = White wire
- G = Green wire.
Same as with a 2-wire thermostat, you just need to follow the same exact step-by-step process.
Note: White wire is sometimes marked as W and W1, so don’t get confused with both, as it all depends on the thermostat model.
4-Wire Thermostat Wiring
This type of wiring is mostly used in modern smart thermostats such as Google Nest, which is the best thermostat on the market, in my opinion.
In addition to red, green, and white wire, this type of thermostat also has blue or yellow wire for cooling.
You can see these thermostats on HVAC devices that can cool and heat.
The only thing you have to pay attention to here is to connect the blue or yellow wire to Y – many people get lost here, so stay focused.
It’s a bit harder than the previous types of thermostats we mentioned, but just pay attention to that blue or yellow wire.
5-Wire Thermostat Wiring
This is the same type as a 4-wire, but it only has an additional “C” wire.
Thermostats with 5 wires are the most versatile ones as they allow you to control everything from furnaces to air conditioners and heat pumps.
There’s a black wire that you need to connect to the C terminal. Other than that, everything is the same as with a 4-wire thermostat.
We have all the basics covered, and you should be able to replace and install a new thermostat without spending money on professionals.
FAQ
Do you need an electrician to change a thermostat?
No! If you have the tools required, you should be able to replace a thermostat yourself. There are instructions with the new thermostat that will tell you exactly how to do it but if you don’t feel comfortable doing it yourself, you can hire a local handyman, HVAC tech or electrician. We have more details here.


Download this FREE cheat sheet to find 28 tricks that can help you save on your electricity and heating bill each month.
Click here to get a FREE Cheat-Sheet

![6 Best Heat Pump Thermostats [Full Buying Guide]](https://homecaprice.com/wp-content/uploads/best-heat-pump-thermostats-768x512.png)
